![]() One of the reasons I got into IT was that I really enjoy learning new things. Unfortunately, there are so many things to learn that it’s easy to get overwhelmed. Does it make sense to do a deep-dive into each technology that you use, or does it sometimes make sense to skim the cream off the top and move on to the next technology?
One of the reasons I got into IT was that I really enjoy learning new things. Unfortunately, there are so many things to learn that it’s easy to get overwhelmed. Does it make sense to do a deep-dive into each technology that you use, or does it sometimes make sense to skim the cream off the top and move on to the next technology?
In this post, I’m talking about git, the distributed source control system that is used in GitHub, Azure DevOps Repos, GitLab, and countless other places. Git can be really complicated, and intimidating, so I’m going to try to convey the tiny fragment of git which allows me to get my work done.
Just Eight Commands
Here are the commands I regularly use:
- git clone
- git checkout
- git add
- git commit
- git push
- git pull
- git branch
- (occasionally) git stash
That’s it. Eight commands.
Here’s how I do things. If you’re a git guru and see ways to improve this simple workflow, let me know. Also, know that I’m usually working on projects by myself, but I try to work like I would on a team.
Starting Off
To start, I clone the repository that I’m going to be working on. For instance, if I wanted to work on WPFBot, I’d go to the github repo for it and get the URL:
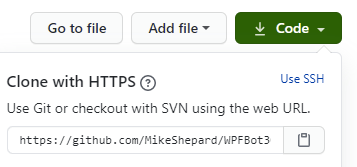
With that, I can issue the command:
git clone https://github.com/MikeShepard/WPFBot3000
and git will copy the remote repository into a local directory called WPFBot3000 ready for me to edit.
If I’m starting a new project, I would create a repo (Github, AzureDevops, etc.) and clone it locally.
I could create it locally and push it up, but this way I only have one method to remember.
Preparing for changes
Before I make any changes, I need to make sure I’m on a branch dedicated to my changes.
If this is a new set of changes I’m working on, I can create the branch and switch to it with the command:
git checkout -b BranchName
(where BranchName is a descriptive label for the changes I’m making.
If the branch already exists,
git checkout BranchName
will switch me to the existing branch.
Making Changes
Making changes is easy. I just make the changes. I can edit files, move things around, delete files, create folders, etc.
As long as the changes are in the repo (the WPFBot3000 folder, in this case), git will find them.
There are no git commands necessary for this to happen.
Staging the Changes
I tell git that I’ve made changes that I like using the command
git add .
This says to “stage” any changes that I’ve made anywhere in the repo.
Staging changes isn’t “final” in any way. It just says that these changes are ones I’m interested in.
As before, I could use sophisticated wildcards and parameters to pick what to stage, but by working on short-lived branches I almost always want to stage everything I’ve changed.
Committing the Changes
Committing the changes is like setting a milestone. This is a point-in-time where the state of these files is “interesting”.
I do this using the command: git commit -m ‘A descriptive message about what changes I made’
A few things to note about commits:
- Interesting doesn’t always mean finished. I can commit several times without pushing the code anywhere.
- “descriptive” is subjective. There has been a lot written about good commit messages. Mine probably are bad.
Repeat the Cycle
If I’m not done with the changes, I can continue the last 3 steps:
- Making Changes
- Staging the Changes
- Committing the Changes
All of these steps are happening locally, but by committing often I have chances to roll-back to different places in time if I feel like it (I rarely do).
Completing the Changes
The next step is a bit of a cheat.
I hate remembering long git commands, so rather than remembering how to link my local branch with the remote repo, I simply say
git push
Git will reply with an error message because it doesn’t know what remote branch to push it to.
In the error message, though, it tells me how to do what I want:

In this case, it’s
git push –set upstream origin TEst (and yes, branch names are case-sensitive)
Pull Request
At this point, I go to Azure DevOps or GitHub (I don’t use GitLab much) and browse to the repo.
It will usually have a notice that a branch was just changed and will give me the opportunity to create a pull request.
A pull request is a request to merge (or pull) changes from one branch into another.
Typically, you’re merging (or pulling) changes from your branch into master.
Once you’ve created the pull request, this is the time for your team members to review the changes, make suggestions, and approve or deny the request.
If you’re working alone, you can approve the request yourself.
I also select the “delete the branch after merge” option so I don’t have a bunch of old branches hanging around.
If the merge is successful, then the changes are now part of the master branch on the remote repo.
They are only in my feature branch locally, though.
Pulling Changes Down
To get the updated master branch, I have to first switch to it:
git checkout master
Once I’m on the branch, I can
git pull
to pull the changes down.
Cleaning up and Starting over
Now that our changes are in master, I can remove the local branch with:
git branch -d BranchName
At this point, I don’t usually know what I’m going to work on next.
I have a bad habit of accidentally making changes in master locally, though so my next step helps me avoid that.
I simply check out a new branch called Next like this:
git checkout -b Next
Note: This is exactly what we did at the beginning, just with a temporary branch name of Next.
When I’m ready to work on a real set of changes, I can rename the branch with
git branch -m NewBranchName
Summary
That probably seemed like a lot, but here are all of the commands (with some obvious placeholders)
- git clone <url>
- git checkout -b BranchName
- git add .
- git commit -m ‘Fantastic commit message’
- <repeat add/commit until ready to push>
- git push (followed by copy/paste from the error message)
- <proceed to create and complete the pull request>
- git checkout master
- git pull
- git branch -d BranchName
- git checkout -b Next
Bonus command – git stash
If I find I’ve made changes in master, git stash will shelve the changes. I can then get on the right branch and do a git stash pop to get the changes back.
With the adoption of the git checkout -b Next protocol, though, I don’t find myself needing this very often.
What do you think? Does this help you get your head around using git?